We have talked about MIDI in various posts, and obviously: MIDI is a fundamental component of any DAW or digital audio studio.
MIDI messages are those that allow software and hardware to communicate, informing the parties what to do, when and why. Without MIDI not much can happen.
You can find all the specs about it on MIDI.org, and it’s worth at least giving it a look.
It is generally thought that via MIDI it is only possible to communicate which sound and at what volume to play, establishing a direct connection between your MIDI keyboard (for example) and the virtual synth you are using (in standalone or VST mode is the same).
While on a PC MIDI is handled via USB, on hardware MIDI signals are handled via 3 ports, called MIDI in, Out and Thru, using special cables.

Each instrument is assigned to a specific MIDI channel and controller and synth talk exclusively on that channel (a channel is an independent path over which messages travel to their destination. There are 16 channels per MIDI device).
So when you press a key on your MIDI keyboard sending it on MIDI channel 16, only the synth listening on channel 16 will respond to that signal and emit the sound corresponding to that MIDI message, of the duration and intensity established by your touch.
Peripherals setup is one of the funniest parts of the job (very ironic).
Maybe it seems strange, but it’s exactly the same thing that happens when you press the key a, b, c or whatever you want on the PC keyboard. A message is sent to the computer and the letter appears on the screen.
However, MIDI is capable of sending and receiving many other types of signals, standardized in a protocol called MIDI CC.
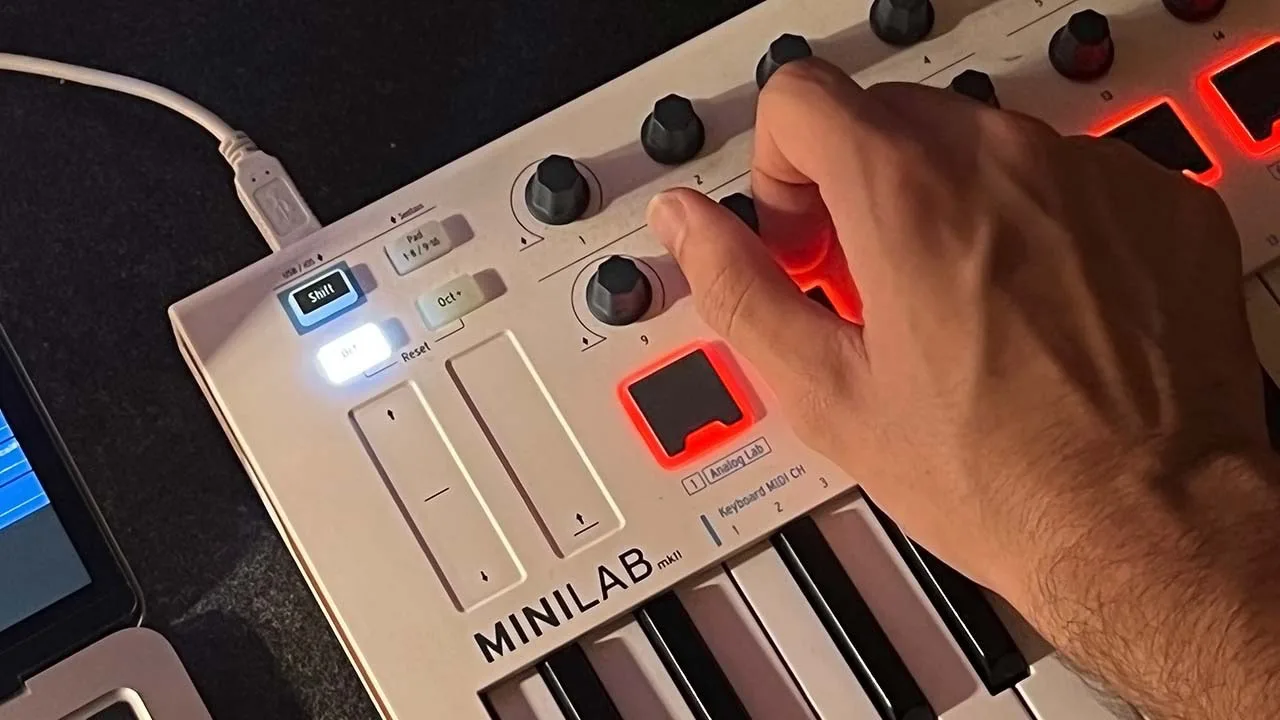
MIDI keyboards these days come with lots of knobs and sliders, which don’t have much to do with play music, apparently. A midi keyboard usually has no sound generators, so much so that it is also called a “mother keyboard“.

In fact, from the concept of a mother motherboard, i.e. one that does not emit any sound but just MIDI signals dedicated to transmitting data to a synth capable of interpreting and converting it into sound, we have moved on to the concept of MIDI controller.
While on a synthesizer those controls would be used to manage the audio engine of the synth itself, on a MIDI controller they are used to manage the amount of parameters that “turn the knobs” on the VST synth. For example:
Let’s imagine we want to do the same thing, but via software, with a VST synth that emulates the TB-303 in the video.
The TB-303 is a celebrity, so it’s not at all difficult to find a software version of it, free or for a fee.

Our goal is to replicate that behavior with our VST, emulating the hardware pots with those of our MIDI controller (this is called MIDI Learn), possibly recording our performance with the knobs over the time (Automation).
Sound difficult? Is really easy and effective. The next video show how do in Studio One because is the DAW that i use, but any DAW has this functionality.
MIDI Learn is an immensely powerful feature that allows you to remote control virtually any on-screen parameter with a MIDI controller. It is a very flexible system that can adapt to the MIDI device you use and allows changes made to any learned parameter to be recorded by the host application.
But how do you tell the DAW to turn this knob at this point and with this intensity?
Your tracks in the DAW have different layers: in one you record the sound events, in the Automation layer the MIDI CCs. Very easy and almost automatic. Furthermore, all events in the Automation layer can be recorder and edited very easily, for fine tuning.
It’s not difficult and will greatly improve your workflow, try it.
Being able to use a physical controller is certainly a better method than turning knobs and dragging sliders one at a time on a monitor with a mouse, as if you only had one finger. Think about how to mix multiple tracks simultaneously with the physical sliders of your MIDI keyboard, for example. Just assign the physical sliders to the DAW volume sliders, and done.
And if you have a mixed studio, integrating hardware audio devices and feticist synths or Modular, you know how It gets very annoying having to get up, go to the synth and change the sound, then go back to the DAW, etc etc. when you just want try a different sound. Well, use automation and live happy.
After having delved into MIDI, you can also dedicate yourself to the light show via MIDI, but this is another topic.