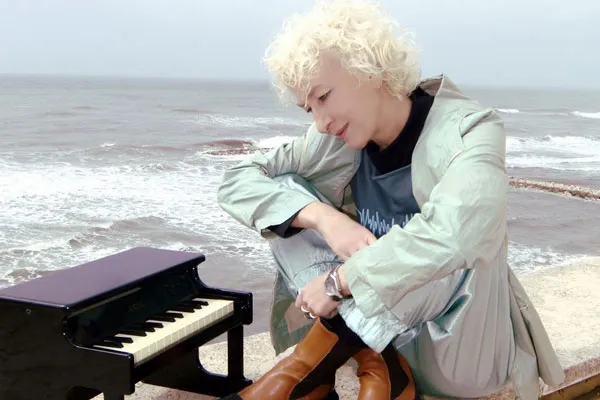
To celebrate the end of the crowdfunding campaign that made the project Satie Mon Amour possible, we are once again joined by Alessandra Celletti and her magical piano.
As announced, here we go. Tonight 2 june 2025 at 22PM SLT in Second Life at The Hexagon Alessandra will present us some songs from Satie Mon Amour, her project dedicated to her beloved Erik.
Alessandra Celletti is one of the best Italian pianists without any doubt. For her it is “normal” to play scores by Erik Satie or Philip Glass, without disdaining Mozart or the great classical composers, or make contemporary experimental electronic music with Hans Joachim Roedelius and in Italy with Gianni Maroccolo.
“The most beautiful secret of Italian Music” (La Repubblica magazine). Alessandra Celletti, pianist, composer and singer comes from a purely classical background, but her musical and artistic experiences multiply with sudden deviations in a very personal music world; away from labels, her unique and irreplaceable center of gravity is the piano”.
Her passion for Satie was born in a curious way, as she explains.
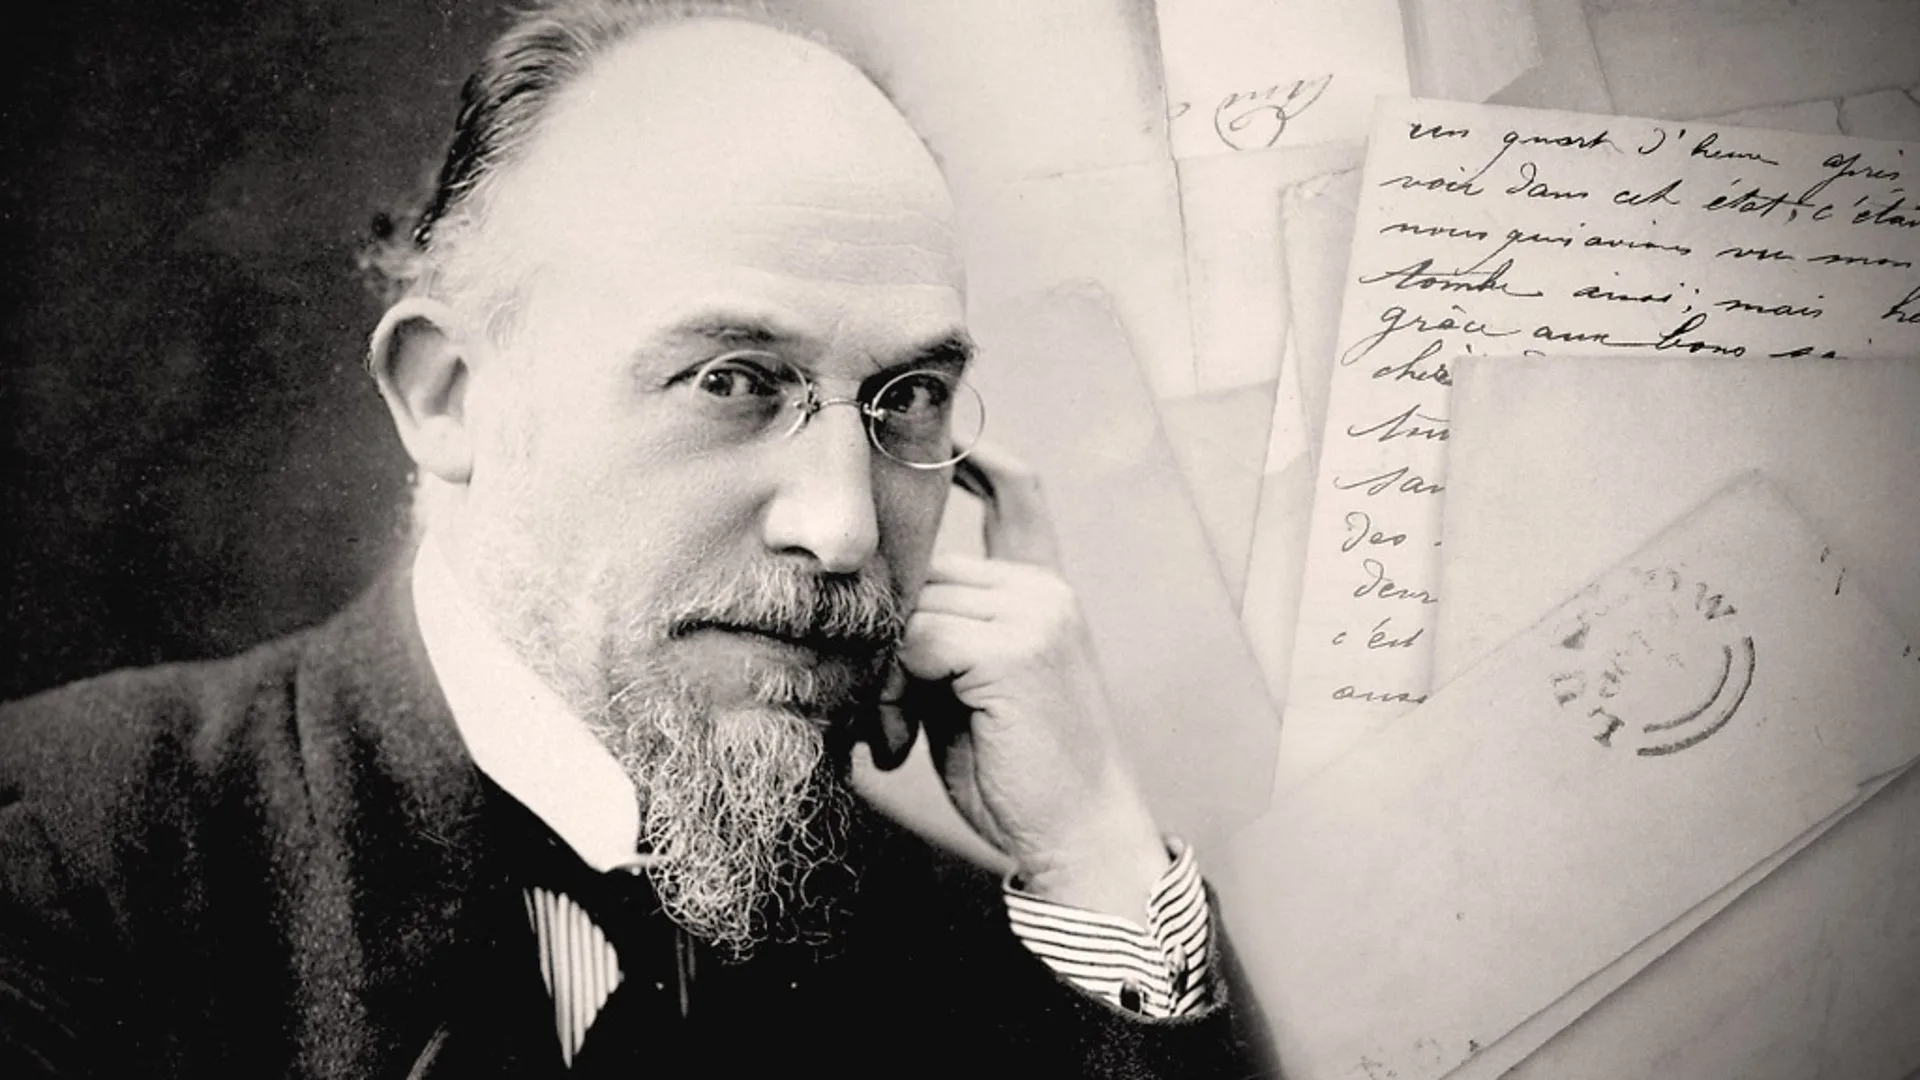
“My relationship with Erik Satie is something unique, almost symbiotic, a deep bond that defies the boundaries of time and space. He was my first great musical love, and since then his presence has never left me. There is not a concert in which I do not play at least one of his compositions, even if only as an “encore”. I was 11 years old and in my first year at the conservatory when I met him as a “punishment”.
I didn’t like studying scales and doing exercises very much, and so my teacher, to punish me, assigned me a “minor” author for the end-of-year recital. The other students in the course would have performed simple but prestigious pages by Chopin or Mozart — I, instead, would have performed some excerpts from “Parade” by this Frenchman of little importance: Erik Satie.
Since then, punishments have become something very interesting for me, if not downright fun. What struck me immediately about Satie is his profound lightness, or, to put it the other way around, his light depth. An apparent contradiction that magically finds its way into his art. His compositions, often seemingly simple, hide an emotional and intellectual complexity that never ceases to amaze me”.
Erik Satie
This year marks the centenary of Erik Satie’s passing, and Alessandra has decided to celebrate it with a special work.
To realize this project Alessandra has decided to use crowdfunding as a financing tool, and in Second Life she will do two presentation concerts: an introductory one, approximately on June 2nd, and one to conclude the fundraising campaign before June 15th.
Alessandra Celletti play Erik Satie.
Alessandra decided to celebrate Erik Satie by creating a project that includes concerts, the recording of an album with his most beautiful compositions: Gymnopédies and Gnossiennes, alongside some of her own compositions that somewhat connect to his style and poetry. She also composed an unreleased track that gives the entire project its name: Satie Mon Amour is a tender and melancholic waltz, perhaps with a touch of irony.
Then, for for the final concert, we will all see together in Second Life an animation video created by Paola Luciani, a video artist I admire greatly for her refined creativity.
A great project and two exceptional musicians in a virtual world. What more could you want? Very romantic.
We will soon communicate the locations, times and definitive dates for the two events.
Alchemelic do that wondrous thing – artists at work – where they come by and read the environment, and generate visuals to add to d-oo-b‘s amazing music and literally work a kind of magic on the event. Kalyca‘s dancing is passionate and the visuals create a bridge between alchemelic and their audience. Well worth catching this original and authentic performance.
For my AI experiments I personally use ComfyUI, which is easy to use and flexible with its node-based interface. It also has a lot of ready-made workflows, and when a model is not available the program knows where to download it. Simple and easy.
Support for ACE-Step (an open-source music generation model jointly developed by ACE Studio and StepFun) has recently been added and it generates various music genres, including General Songs, Instrumentals, and Experimental Inputs, all supported by multiple languages.
ACE-Step is really very interesting (read at least the presentation on his home page) as it allows rich extensibility for the OSS community: through fine-tuning techniques like LoRA and ControlNet, developers can customize the model according to their needs, whether audio editing, vocal synthesis, accompaniment production, voice cloning, or style transfer applications. The model is a meaningful milestone for the music/audio generation genre.
The possibility of inserting lyrics for the singing is remarkable, very effective.
Add the ability to edit existing music and imagine the endless possibilities by yourself.
What else to say, you have to try it!
This is a raw short video of a 3 minute song generated in 145 seconds with a simple prompt on my poor PC (6GB VRAM).
Crazy. From China, fist of fury . For free, on your PC.
A while back, Paradise Now (Philippe Franck) crossed over to another dimension, and to celebrate some weirdos in Korea thought of creating a 24-hour mixed reality event.
“This Saturday, we will be connected for 24 hours, via the Internet, to the KOTE gallery, located in Seoul, Korea.
And we’ll be able to imagine, share and celebrate with them, with all of us, surrounded and accompanied by PLANNED ACCIDENTS, Transcultures and the Société i Matériel, our utopias or our En/Vies, our memories, our love of Art, our completed works or those still in the making – in fact, everything that animated and irradiated Philippe Franck / Paradise Now in an absolutely irrational way, and perhaps made him particularly irresistible for some “in the manner of speaking”. By constantly transforming him into an electric snowdrop locomotive. In trance/sonic breath. “That’s entertainment“.
In Second Life replies the event organized by A Limb.
Nine hours of music around Second Life. Everything went smoothly, with passion and beautiful musical proposals.
The brave Glasz filmed and shared the whole thing live in HD, and now all the performances can be seen on Youtube, a 9 hours mega film in two parts (i suggest Cinema or Full screen mode).
Part 1:
Part 2:
Since it could be difficult to follow all the concerts in different locations, Renee made an efficient HUD to guide all the teleports to their destinations. As far as we know, no avatars were lost.
Everyone did their part, congratulations to everyone. I followed the entire nine hours of the concert, maybe I don’t have the body anymore because in the morning Renee found me on an ice floe wearing a red polka dot bikini. I don’t know how it happened, I think someone put something in my drink. But never mind, it was touching and beautiful event.
I’ll never know what happened. I think it was Daddio, but I have no proof. Renee found me and saved, she is holy woman.
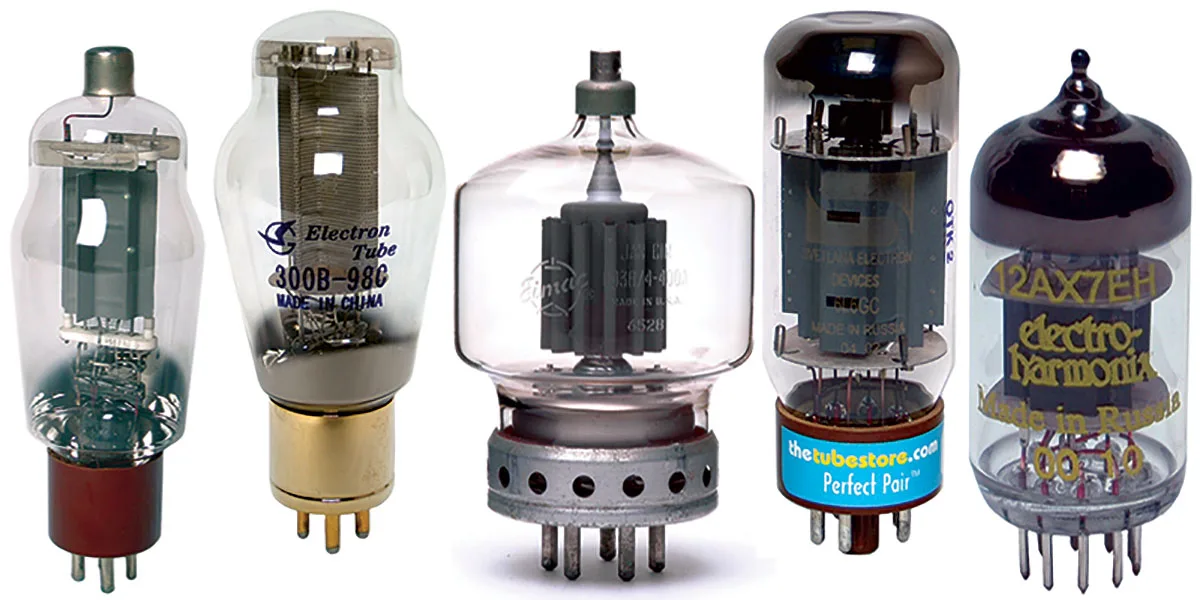
We always hear about the “tube sound“, which is hot, sexy and you know what. Will it be true?
There’s probably some truth to it, without mythologizing. For what reason?
Trying to avoid falling into Alice’s hole of esoteric sound discussions, there are practical reasons why we talk about transistor or tube sound, and their differences in terms of audio.
Furthermore, a good tube audio amplifier costs much more than a transistor one (but not mandatory).
When talking about tube vs transistor sound, it is easy to fall into strange discussions that are not always scientific, but in general tube sound is attributed a special quality in terms of perception.
So I asked myself how to insert and check whether there really is an advantage or not in inserting valves into my mix chain? And how to do it without having to sell a kidney?
I’m a DIY enthusiast, so I started looking around for some inexpensive (very inexpensive) kit suitable for the experiment. Ultimately all I need is what’s called a buffer, one which has a stereo input and output.
A VERY expensive solution, but that’s what I want to try to do.
Look here, look there in the end I bought a Chinese buffer on a famous Chinese e-commerce (you can guess which one…) for 11 euros. Since I was in the mood for crazy expenses, I also bought a plexiglass box to house the kit, which is always better to have a home, like all electrical things.
Subsequently I also started changing tubes, which is one of the favorite rituals of audiophiles, but this is not important.
My 11 euro kit and its transparent house (2 euro or less, i don’t remember).
At this point I connected the line output of my sound card to the buffer input, and the buffer output to the stereo input of the sound card to make a loop and I mixed the original signal with that of the buffer. Harder said than done.
This buffer requires to be powered by 12 volts AC, so check that you have a suitable power supply at home, AC is not so common.
In any case there are many different types of buffers, you don’t necessarily have to buy the cheapest one like I did, just search for “diy tube buffer” or similar.
Works? It does not work? In my
opinion yes, it works, especially on the vocals it adds something that makes them more distinct in the mix. But that’s just my opinion, after all it costs little to try.
I forgot: in the kit I used, the input and output pins are not indicated, they are in the instructions printed in small letters only in Chinese… when you try to locate them, keep the volume low.
The circuit is a bit noisy, but you can find indications on some audio forums on how to reduce it, if you decide to use the buffer permanently.
Event streamed on usual audio channel, and at the same time live video on a MOAP in SL
Taking its form as mostly a live improvisational music project, Echo Starship is heavily influenced by an experimental/psych spectrum of sounds ranging from Drone, Noise, Ambient, Contemporary Minimalist music and all the way to Post-Rock, Krautrock, IDM, Synth Wave elements.
He uses for his performance an arbitrary selection of instruments ranging from electric guitar, prepared instruments, field recordings & samples, synthesizers, electronics, piezo microphones, and other types of “odd” instruments.
It takes form as a live improvisational exploration of experimental, ambient, contemporary classical, and drone music with performances at various festivals, venues, and internet streams. More at https://ampeff.com/
The list of participating artists is pretty interesting, apart from me. I’m playing Saturday at 3PM SLT, if anyone is interested.
The main venue will be on ground level with stage floating on water and bleacher seating on the RadioSpiral sim. Radiospiral will also take care of rebroadcasting the event on their channel.
Schedule of performers:
Art Opening:
FRI 11am PST Mutant Memory Tom Britt
LIVE MUSIC:
FRI 12pm Mao Lemieux 1pm Jana Kyomoon 2pm Echo Starship 3pm Aleatorica 4pm Cypress Rosewood