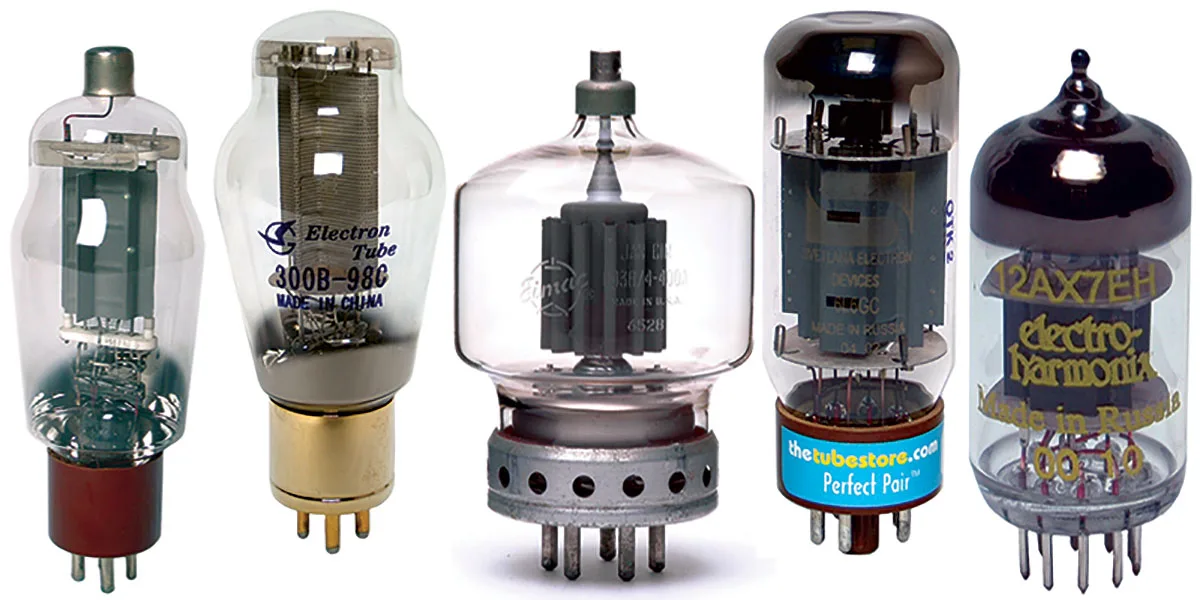
We always hear about the “tube sound“, which is hot, sexy and you know what. Will it be true?
There’s probably some truth to it, without mythologizing. For what reason?
Trying to avoid falling into Alice’s hole of esoteric sound discussions, there are practical reasons why we talk about transistor or tube sound, and their differences in terms of audio.
Furthermore, a good tube audio amplifier costs much more than a transistor one (but not mandatory).
When talking about tube vs transistor sound, it is easy to fall into strange discussions that are not always scientific, but in general tube sound is attributed a special quality in terms of perception.
So I asked myself how to insert and check whether there really is an advantage or not in inserting valves into my mix chain? And how to do it without having to sell a kidney?
I’m a DIY enthusiast, so I started looking around for some inexpensive (very inexpensive) kit suitable for the experiment. Ultimately all I need is what’s called a buffer, one which has a stereo input and output.
A VERY expensive solution, but that’s what I want to try to do.
Look here, look there in the end I bought a Chinese buffer on a famous Chinese e-commerce (you can guess which one…) for 11 euros. Since I was in the mood for crazy expenses, I also bought a plexiglass box to house the kit, which is always better to have a home, like all electrical things.
Subsequently I also started changing tubes, which is one of the favorite rituals of audiophiles, but this is not important.
My 11 euro kit and its transparent house (2 euro or less, i don’t remember).
At this point I connected the line output of my sound card to the buffer input, and the buffer output to the stereo input of the sound card to make a loop and I mixed the original signal with that of the buffer. Harder said than done.
This buffer requires to be powered by 12 volts AC, so check that you have a suitable power supply at home, AC is not so common.
In any case there are many different types of buffers, you don’t necessarily have to buy the cheapest one like I did, just search for “diy tube buffer” or similar.
Works? It does not work? In my
opinion yes, it works, especially on the vocals it adds something that makes them more distinct in the mix. But that’s just my opinion, after all it costs little to try.
I forgot: in the kit I used, the input and output pins are not indicated, they are in the instructions printed in small letters only in Chinese… when you try to locate them, keep the volume low.
The circuit is a bit noisy, but you can find indications on some audio forums on how to reduce it, if you decide to use the buffer permanently.
The ear is a sensor, like the eye, and they work like all our senses. They receive stimuli, in this case sound waves, and transform them into messages that our brain interprets based on its experience.
Besides, our perception of sound is limited, our brain does not interpret sounds below or above a certain threshold.
Human hearing is sensitive to a wide spectrum of acoustic frequencies (over 10 octaves), extending from approximately 16 to 20,000 Hz (often indicated as 20 to 20,000) and to a range of sound intensity extended from the minimum threshold limit (by convention, 0 dB), to the maximum acceptable given by pain (and then by rupture of the eardrum, approximately 140 dB).
And since the sound sensation is not proportional to the sound pressure values, their representation has been facilitated with the use of logarithmic growth ratios (dB).
But apart from these, so to speak, somewhat technical considerations, for a musician to possess the perfect (or absolute) pitch is a gift. If you play an instrument, you have certainly tried to identify the chords of a song for endless tests in order to identify its melodic line. Imagine if it had been enough to listen to identify them exactly…
Absolute pitch is an act of cognition, needing memory of the frequency, a label for the frequency (such as “B-flat”), and exposure to the range of sound encompassed by that categorical label.
Musicians such as Mozart (who demonstrated this ability at 7 years old), Beethoven, Toscanini or Glenn Gould were gifted with this blessing, and the list among musicians is long. It’s not a sign of anything, but certainly a nice convenience.
I loved this scene on Amadeus movie, when Mozart dictate to Salieri his Requiem without the help of any tool or instruments, just seeing the music in his mind and singing.
Mozart using his perfect pitch for dictate his Requiem note by note on the first try.
We are not all Mozart, of course, but it is possible to improve our inner ear by doing specific exercises.
Ear training is a music theory field of study where musicians use only their hearing to identify pitches, melodies, chords, intervals, rhythms, and various other basic elements of music. With ear training, you can connect notes and other musical elements just by hearing them.
If it goes badly you will have just wasted some time, but I think that doing some exercise is always good, even if you are not a musician but “only” a music user.
For example, try doing some exercises for free on Teoria site, and remove some rust from your ears.
In my opinion time well used, but that’s just my opinion.
We have talked about MIDI in various posts, and obviously: MIDI is a fundamental component of any DAW or digital audio studio.
MIDI messages are those that allow software and hardware to communicate, informing the parties what to do, when and why. Without MIDI not much can happen.
You can find all the specs about it on MIDI.org, and it’s worth at least giving it a look.
It is generally thought that via MIDI it is only possible to communicate which sound and at what volume to play, establishing a direct connection between your MIDI keyboard (for example) and the virtual synth you are using (in standalone or VST mode is the same).
While on a PC MIDI is handled via USB, on hardware MIDI signals are handled via 3 ports, called MIDI in, Out and Thru, using special cables.
Midi In, Out and Thru allow you to connect any type of MIDI instrument.
Each instrument is assigned to a specific MIDI channel and controller and synth talk exclusively on that channel (a channel is an independent path over which messages travel to their destination. There are 16 channels per MIDI device).
So when you press a key on your MIDI keyboard sending it on MIDI channel 16, only the synth listening on channel 16 will respond to that signal and emit the sound corresponding to that MIDI message, of the duration and intensity established by your touch.
Peripherals setup is one of the funniest parts of the job (very ironic).
Maybe it seems strange, but it’s exactly the same thing that happens when you press the key a, b, c or whatever you want on the PC keyboard. A message is sent to the computer and the letter appears on the screen.
However, MIDI is capable of sending and receiving many other types of signals, standardized in a protocol called MIDI CC.
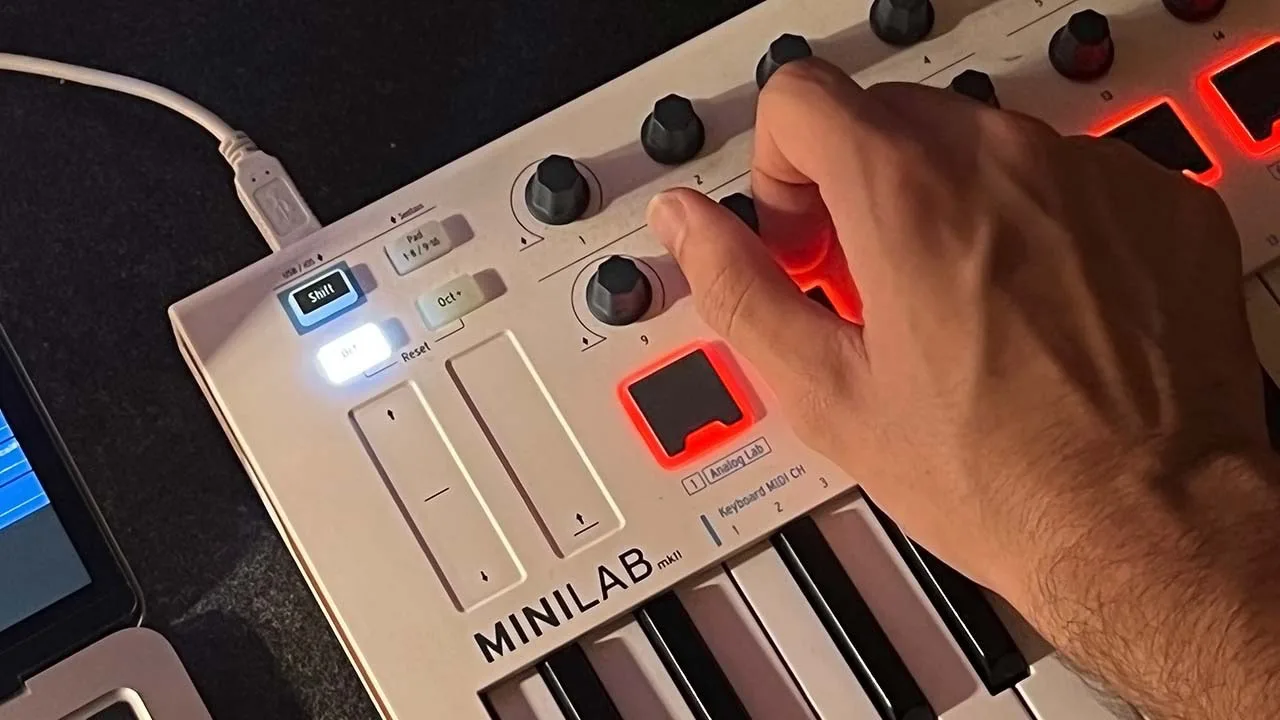
MIDI keyboards these days come with lots of knobs and sliders, which don’t have much to do with play music, apparently. A midi keyboard usually has no sound generators, so much so that it is also called a “mother keyboard“.
My Keylab show a lot of controllers, pads, knobs, to do what? They don’t make any sounds, except for the pads if necessary.
In fact, from the concept of a mother motherboard, i.e. one that does not emit any sound but just MIDI signals dedicated to transmitting data to a synth capable of interpreting and converting it into sound, we have moved on to the concept of MIDI controller.
While on a synthesizer those controls would be used to manage the audio engine of the synth itself, on a MIDI controller they are used to manage the amount of parameters that “turn the knobs” on the VST synth. For example:
Watch what happens by turning those knobs Cut Off, Resonance and Accent hardware side.
Let’s imagine we want to do the same thing, but via software, with a VST synth that emulates the TB-303 in the video.
A VST version of our TB-303. Using the MIDI controller, we need to replicate the effect seen on video turning the Resonance and Cutoff pots on VST.
Our goal is to replicate that behavior with our VST, emulating the hardware pots with those of our MIDI controller (this is called MIDI Learn), possibly recording our performance with the knobs over the time (Automation).
Sound difficult? Is really easy and effective. The next video show how do in Studio One because is the DAW that i use, but any DAW has this functionality.
Setup of a keyboard controller and assigning MIDI CC to keyboard controls.
MIDI Learn is an immensely powerful feature that allows you to remote control virtually any on-screen parameter with a MIDI controller. It is a very flexible system that can adapt to the MIDI device you use and allows changes made to any learned parameter to be recorded by the host application.
But how do you tell the DAW to turn this knob at this point and with this intensity?
Your tracks in the DAW have different layers: in one you record the sound events, in the Automation layer the MIDI CCs. Very easy and almost automatic. Furthermore, all events in the Automation layer can be recorder and edited very easily, for fine tuning.
Example in Studio One, but any DAW has the same functionality. Look the manual for “Automation”.
It’s not difficult and will greatly improve your workflow, try it.
Being able to use a physical controller is certainly a better method than turning knobs and dragging sliders one at a time on a monitor with a mouse, as if you only had one finger. Think about how to mix multiple tracks simultaneously with the physical sliders of your MIDI keyboard, for example. Just assign the physical sliders to the DAW volume sliders, and done.
And if you have a mixed studio, integrating hardware audio devices and feticist synths or Modular, you know how It gets very annoying having to get up, go to the synth and change the sound, then go back to the DAW, etc etc. when you just want try a different sound. Well, use automation and live happy.
Program change on a external hardware device.
After having delved into MIDI, you can also dedicate yourself to the light show via MIDI, but this is another topic.
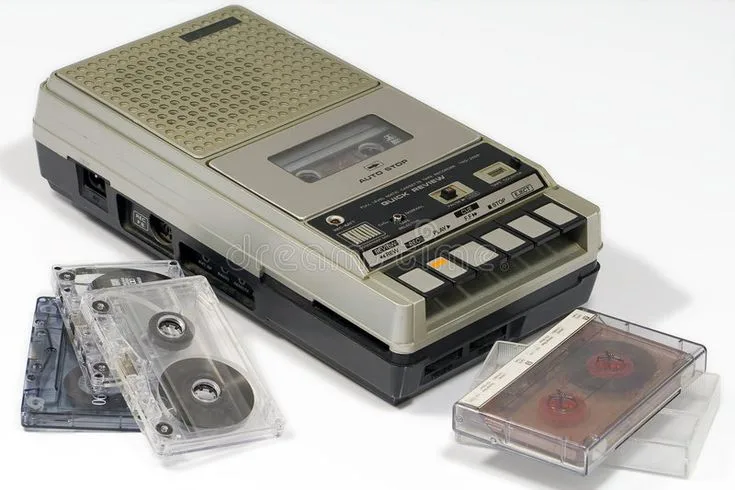
While traditional studio recordings provide the luxury of multiple takes and post-production editing, capturing a live performance brings a distinct charm that’s hard to replicate. The unfiltered essence of a sound’s chemistry, the real-time interactions, and the genuine connection with the music come alive on screen, giving a taste of what it’s like to be front and center at a concert.
I don’t think there’s any doubt about. But how to do it that on a computer? Even in digital world you need “cables” to connect the audio output of your DAW to the software you use to record, whatever it is. If you are on Windows, the operating system will probably not help you and will make the use of an audio router almost essential, and you will have to have the patience to align the various software regarding Sample Rate, latency, USB buffers, etc. etc.
Furthermore, Windows has the unique ability to reset your audio preferences with each update, find out why. So if you had set your preferences manually you will find them back with the default Windows setting, which almost never coincides (for example, I record at 24 bit/48000 Hz but Windows regularly sets 16 bit, even if the sound card driver says otherwise). The worst thing is that Windows also resets the preferences regarding the so-called audio Exclusive Control, so something that used to work no longer works.
I mean, you’ve prepared your performance and all kinds of drugs are pushing into your brain and lo and behold, you press Record in your recording software and… error. “The recording device is not responding”. It’s not nice. Coitus interruptus of the worst kind.
But there is a way to solve the embarrassment: record directly from within your DAW. Fortunately, there are VST plugins to do this. Personally I use MRecorder by Melda Production, the free version.
Very simple but effective, with a series of options (some only usable with the paid version, but not essential for my use).
MRecorder interface.
It is a free plugin, downloadable with the MFreeFXBundle by Melda Production (38 free effects, not to be underestimated). And that’s the end of this problem. Put it in the main stereo mix bus on DAW mixer and live free.
During the last meeting with the management of Linden Lab to which I was invited and in which the excellent Project Zero was presented, I asked a question that was quite off topic (but also not, basically we were talking about the evolution of Second Life) to Philip Rosedale regarding a possible and necessary development of audio in Second Life.
Why did I ask him of all people present at meeting?
Maybe someone remembers the virtual world he created some time ago, High Fidelity. Now this virtual world is no more (plans for gatherings on the High Fidelity platform to use virtual reality were scrapped by the beginning of 2019, and the platform became audio-only) and High Fidelity takes care of Advanced Audio Processing quite well, as the name announced from the beginning.
You can listen to some examples on the High Fidelity site, and the approach seems right suited to Second Life, both for Voice, and for the musicians, and for the environmental sounds.
Wear your headphones and try this to understand the topic, for example.
Pretty impressive, right? No, no one is knocking on your door 🙂
I remember that during the development of Sansar Linden Lab had started an approach regarding spatial and 3D, volumetric, audio. I don’t know if this experiment with ambisonic sounds was implemented in the final version, it’s been a long time since I visited Sansar. The conditions were very interesting and everyone ran to buy ambient microphones.
But, seeing Rosedale on the other side of screen, I had to ask.
I put on my poker face and asked directly.
“Excuse me Philip, maybe we can hope in the future to have a developement of Second Life on Spatial Audio?”
He looked surprised and responded immediately. After that I was the surprised one, because he didn’t say no but was open to possibilities.
Audio is one of the most primitive areas of Second Life: ambiental sounds for now are based on a mere support for small audio files (max 30 second each, in mono…) to be imported one by one and with some work assembled with scripting, far from what it is possible to obtain today and if you have watched the example video you can quite simply understand what would be possible instead.
I will not fail to remind us of this quasi-promise whenever possible, that would be wonderful, for musicians but for any user of Second Life.
One of the most controversial things about generative AI in the artistic field is undoubtedly the fact that the gigantic databases on which the generation is based are built with data available on the web, without asking for any authorization from the authors. Some sites have specialized in audio generation, but they do not care about the origin of the generated content and instead focus on the creation of web interfaces designed to facilitate the creation of “songs” that sound “believable”.
This also applies to graphics or wherever AI works generatively, so much so that the prompts can be tacked on with the wording “in the style of [famous name here]”, sometimes resulting in somewhat “artistic” results. But who is the artist in this case? Who wrote the prompt or who actually created the snippet that the AI based the piece on?
In my opinion there is no real creative act in this, it is more a question of luck than anything else.
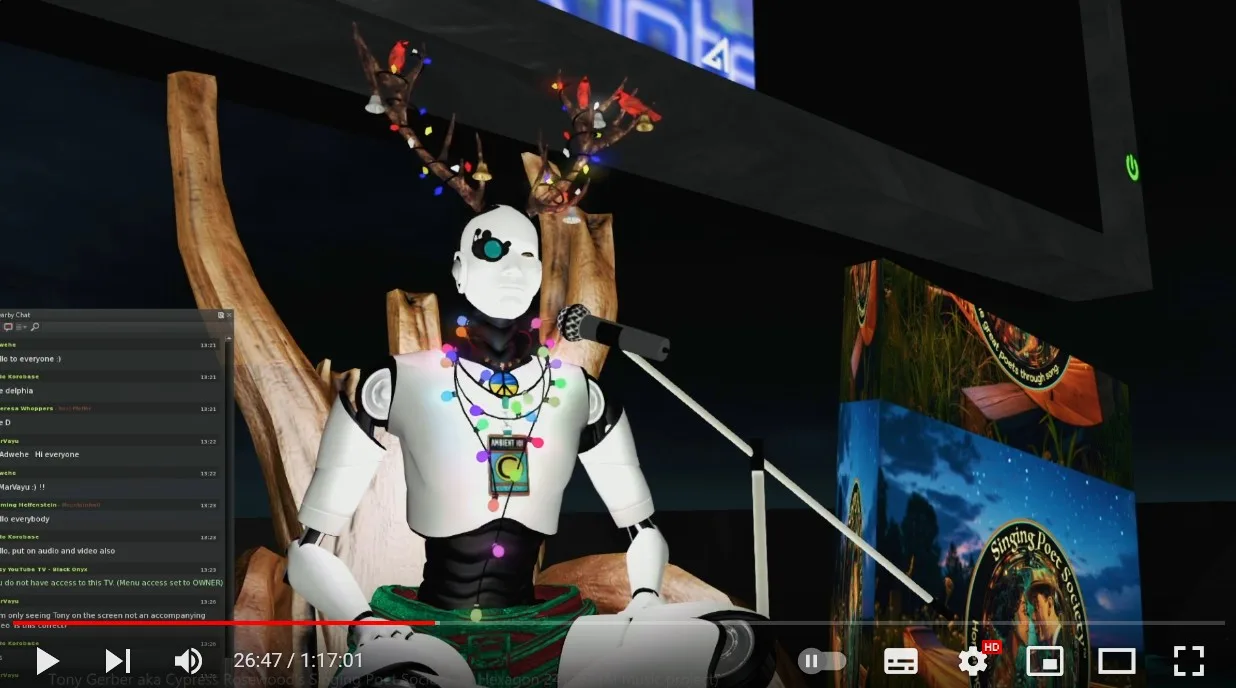
The Singing Poet Society project case instead adds an element that changes the cards on the table. Tony has trained the AI (a process called machine learning) using his own material, aspects that in my opinion constitute the heart of the matter. The AI is used here simply as a tool for the construction of a song, it is not ultimately that different from using sequencers or other generative tools in a DAW.
However, knowing that the one singing is the AI with Tony’s voice is a bit shocking, but that’s what actually happens.
I haven’t come to a personal opinion yet and I don’t know what I think, but removing the use of materials made by others from the scene certainly cleans up the perspective.
Anyway, here is the recording of the evening, so everyone can develop their own conviction.
Tony Gerber aka Cypress Rosewood’s Singing Poet Society @ Hexagon 241207 (AI music project). Video by D-oo-b.
I think we’ve all tried a bit to use artificial intelligence to make music. Initially amazed, then slowly you find the limits, and above all the costs.
My personal view is that machine learning can be used to enable and enhance the creative potential of all people, and I’d like it to be like that for everyone.
That said, there are many platforms on Web, even complex ones, that offer the possibility of creating a song from a text prompt. The “trial” generation is free, but if you need more, you have to switch to a payment plan based on the amount of rendering you need.
However, there is also the possibility of generating music with AI on your computer, downloading several different models, and thus avoiding the costs of online platforms.
I would like to talk here about two solutions that work locally, on your PC: Pinokio and Magenta Studio, two completely different approaches to AI-generated music.
Pinokio
PinokioIt is really a possible solution: its scripts take care of downloading everything you need and configuring the working environment without disturbing your file system in any way. At the installation you will be asked to indicate a Pinokio Home, and everything you download will go inside this directory, no mess around the PC.
The scripts available obviously do not concern only music, but a myriad of applications in all the areas concerned: text, images, videos, and so on and so forth. Warning: each application requires disk space, and the download is quite heavy. Make sure you have space on the disk where you created your Pinokio Home.
I have installed several libraries on my PC, currently the ones you see in the image below. Well, that’s 140 GB of disk space, and unfortunately appetite comes with eating.
Discover page is gigantic and full of distributions.
Anyway, interesting. Worth a try.
Magenta studio
Magenta Studio follow a complete different path and is based on recurrent neural networks (RNN). A recurrent neural network has looped, or recurrent, connections which allow the network to hold information across inputs and these connections can be thought of as similar to memory. RNNs are particularly useful for learning sequential data like music. Magenta currently consists of several tools: Continue, Drumify, Generate, Groove and Interpolate.
These tools are available as standalone programs, but version 2 has become a integrated plugin for Ableton Live, with the same functionality as version 1. They use cutting-edge machine learning techniques for music generation, really interesting.
At the Magenta site you can also become familiar with the so-called DDSP-VST.
Okay, talking about Neural Synthesis may seem like science fiction, but it’s actually simpler than it seems. At the end of the day, it’s just a matter of installing a VST3, which is complex.
If you like to experiment, I find very interesting the part dedicated to the creation of your own instruments, where artificial intelligence can be trained with your samples.
Some time ago I bought a software for VJ (VJing (pronounced: VEE-JAY-ing – is a broad designation for realtime visual performance). Characteristics of VJing are the creation or manipulation of imagery in realtime through technological mediation and for an audience, in synchronization to music.
NestDrop is an ingenious software based on the visualization system produced by the programming language called Milkdrop, originally developed by Ryan Geiss in 2001.
Milkdrop at work. On left, the script that build the image on right.
I like Milkdrop’s beat detection system, it works well and we all know how music and lights in sync can produce pleasant moments.
So, after playing on my own for a bit I said to myself why not try to do a music and light show in Second Life, live?
It’s not as simple as it seems, especially when it comes to Second Life for video. The support is rudimentary, all you can do is apply a URL to the face of an object and start playing it (this is called MOAP, media on a prim). However, this does not guarantee at all that everyone will participate in the event, because in the case of a film, for example, each user start a playback from the beginning and so if someone arrives late they will never be aligned with the other participants, who perhaps are not even aligned with each other. We would like to have a party, not watch a movie each on a separated sofa. Give us our keyframe.
There are systems in Second Life that try to overcome this problem with scripting and other systems, but they are unreliable and complex. How to do it in a transparent, simple and economical way?
A day i visited a sim, Museum Island, where a guy with nickname Cimafilo was streaming a movie, Alice in the wonderland, and i noticed that data stream was small but fluid, in sync (also if on sim was used the parcel media and was not possible understand who and what was managing the sync), so i tried to get some infos about. Cima was using a for me unknow video format, WebM and OBS, with good results in my opinion. So I tried to create a similar system, but suited to my needs: analogous workflow, but using a dedicated server and a higher frame rate.
I can say I succeeded, the system devised can stream and sync audio and video events in Second Life using simple open source tools. Let’s see how.
As mentioned, my goal was to use a VJ program to create an audiovisual event in Second Life.
All you need is any audio player (personally I use Winamp because it’s very light, but any other player is fine) and a VJ software (in my case NestDrop, but any other is fine). The result of our audio and video mix must be able to be captured by the OBS (Open Broadcaster Software), so any program that generates video output on your PC monitor is fine.
Your desktop at the end of first part of setup: from left, Winamp produces sound, NestDrop make the visuals and OBS capture all.
I was thinking to myself, how can I send this output from OBS to Second Life with acceptable quality and in sync for anyone? Showing the video is easy, almost, there are many methods by going from a web page or a streaming service but they all lack the detail that is so important to me: sync.
However, I noticed one thing: almost all of these services use MP4 container or its variants to distribute the content. And by studying, I realized that the MP4 container does not have a sync system suitable for my purpose. I need the sync to be sent at pre-established intervals during the projection. Codecs world is a real jungle managed through trade wars.
At this point I entered a hell of questions and answers on forums, web pages, approximate and/or wrong answers, you name it. I’m also no expert on these things, and this was new territory for me. Double difficulty then.
I convinced myself along the way that the secret was in the format, and indeed it was.
Arguing with FFMPEGspecs I discovered the format that’s right for me: compact, manages good audio (in Opus) and video (VP8 or VP9), open source, all browsers can view it: WebMwas the trick.
Above all, a specification of webM container shoot me: Key frames SHOULD be placed at the beginning of clusters.
Exactly what I was looking for, bingo. In a few words, when the Play key is pressed in the SL viewer, each visitor gets a key frame to sync at the exact point of the actual key in the video. Yes, I want to use this!
Okay, but where do I send this WebM stream if I manage to convince OBS to do broadcasting?
Read here, search there, a server that accepts WebM is Icecast2.
Now comes the slightly complex part, because you need an Icecast video hosting, which will work like Shoutcast hosting which – if you have ever played music in Second Life – you surely already know. Or, you can implement your own server there. I obviously chose the second path both for its affordability and to fully understand how it works.
On the Web it is easy to find offers of virtual servers, even at very low prices. For me I got a VPS with 1 processor, 1 GB RAM, 100 GB hard disk. For an experiment it’s fine, in any case you can always expand. We go.
The installation of a Linux distro is always quite automated, just choose the desired distro from a drop-down menu and in a few minutes the basic server will be operational. So far so good, and I chose Ubuntu 20.04 for myself.
Preparing my VPS
In a few minutes the server is ready. I chose not to install anything apart from Icecast, but obviously the space can be used for all that you need.
Installing Icecast2 is very simple, all you need is a little familiarity with the terminal (for me, Putty) commands and your server is ready in 10 minutes. You can find dozens of tutorials, all copy/pasted from each other.
The only detail that I recommend you take care of is to open port 8000 of the server firewall, or no one will be able to connect and set your audio card setting on Windows at 48000 Hz for the audio side. You don’t need anything else.
Now test if Icecast is responding with a browser, adding :8000 to your server address. In my case, for example: http://vps-94bab050.vps.ovh.net:8000/
The server will most likely be listening.
Pelican Village TV waiting for a mountpoint
When configuring Icecast (you will be asked to specify passwords for admin and other details), you may have a doubt about mountpoints, and the documentation isn’t very clear either: should I create them now? Or when? In reality you don’t have to do anything, OBS (or the software you use for broadcast) will create the mountpoint with the name you chose in the connection string (we see later how).
I connected OBS to server, and the connection created the mountpoint /video, as specified in connection string.
Opening the URL http://vps-94bab050.vps.ovh.net:8000/video (following the example) you can already see what you are going stream in Second Life in a browser window (if someone is streaming, or you get a “Error 404 page Not Found”). The mountpoint is dynamic, this means it is alive as long as the stream is up. When you disconnect your broadcaster, the mountpoint disappears.
To connect OBS to the Icecast server, the issue is not very simple but it can be solved.
In File > Settings > Output > Recordings, select as Output Mode Advanced. Type: Custom Output (FFmpeg) FFMpeg Output Type: Output to URL File part or URL: icecast://user name:password@server URL:8000/mountpoint name User name and password you have set installing Icecast2, remember? Container Format and Container format Description: webm Muxer Settings open a chapter apart. This specs and Encoder settings have do be decided carefully reading the documentation at https://trac.ffmpeg.org/wiki/EncodingForStreamingSites and https://developers.google.com/media/vp9/live-encoding Configurations depends on many factors based on your material, hardware, connection, server. For me personally the string that worked for Muxer Settings is:
(For each parameter meaning and some sample configurations, refer to specs)
To start the broadcasting, push Start Recording button in OBS (we are recording to a URL).
Now what you need is to prepare the “screen”. In Second Life, associate the URL of your mountpoint with the Media texture of object you have chosen as screen and press Play on the viewer. Nothing else is needed. Let the rave begin 🙂
As with cheap sound cards, the market for small desktop monitors is so crowded as to make a reasoned choice based on the technical characteristics is almost impossible, and it all boils down to ok, this speaker looks nice on my desk or not. Yet choosing a monitor is critical, that’s where you’ll hear your sound from, and the monitor should give you a representative sonic spectrum.
But, what are monitor speakers? In a nutshell, monitor speakers are loudspeakers that we use specifically for audio and music production. They’re called monitor speakers or studio monitors because they’re used for monitoring – critical listening during recording, mixing, and mastering. You said nothing.
After having searched without results among billions of offers and catalogues, only one thing was clear to me: it is not possible to make a good monitor without spending at least 350-400 euro, a midwoofer of at least 4″ is needed, plus a good dome tweeter. These are my references.
So, I looked at a few DIY projects, all of which promise marvels and stratospheric listening, but in the end concreteness won (thank goodness) and I looked at a catalog I know well, that of Dibirama (the best in Italy, but certainly there is something equivalent in every country).
The owner is a nice person, I explained my needs to him and he gave me the instructions and the necessary components for my dream monitors. It’s not that things were simpler here also, the catalog is endless, but at least one address has arrived.
The mid-woofer choosen is a Scan Speak 12W/8524G00, the tweeter a Seas 22TFF, both for their excellent features and value for money.
Then you have to think about the acoustic box, because the speakers and the crossover filter will have to be placed somewhere.
We said desktop speakers, the size as usual matters. Therefore, excluding horns or transmission line systems for obvious reasons (the dimension), the most appropriate choice seems to be that of a speaker loaded in DCAAV, (double chamber reflex) we certainly cannot miss the low frequencies. This makes the crate a little more difficult to make, but nothing impossible.
The acoustic box must be designed on the basis of the characteristics of the chosen speakers, it is not that a box is made by chance. Different software are available which allow to simulate the complete system with different types of load.
Turn, pull, spring, cut, mill, here are the cutting planes of the panels that are used to make this monitor (wood thickness 19 mm)
Next we need the filter that will divide the frequencies between the speakers.
It will be something like this:
Obviously you will have to build a pair of all. Don’t skimp on coils and capacitors, they directly affect the sound quality.
As for colors, woods and connectors you can indulge yourself, there is no rule apart from your personal taste.
If instead of looking on shops for the components by yourself you think it’s better to buy a ready kit, I’m sorry to say that this particular case for now is not yet available. But in need, the very kind Diego Sartori of Dibirama will be happy to help you compose the kit of all the components necessary for speakers and filters. Ask for Yuna III.
A possible designSuggested distance between the basement and hoof is 18-20 mm (the speaker is a double reflex, it also emits sound from the lower part, don’t plug the bottom hole).
This isn’t the easiest kit to make carpentry side, it’s a real monitor with amazing performance that will give you satisfaction. Pair them with a good amp, they deserve it.
Impossible to expect more from a speaker big as an A4 sheet. Have fun!
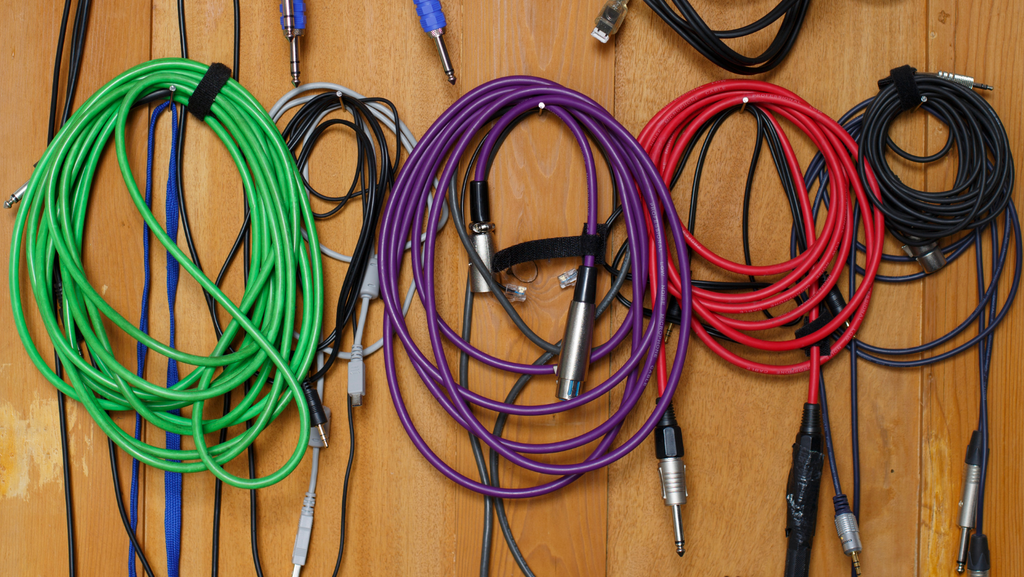
“Audio cable types are some of the most numerous of any cable, with both the consumer and professional space packed with different options for different uses and different generations of technology.” says a extensive guide.
Even in an in-the-box studio you will still need some cables, for example for a microphone or for recording a guitar or keyboard, or anything else that requires a physical connection. Also, you will need USB and MIDI cables. Either way, you’ll soon find yourself in a tangle of cables.
But at least in the digital domain this mess will be mitigated: you don’t need a stereo cable to connect your synths and effects to your DAW, and that’s already a huge step forward in simplification.
Remember Murphy’s Law? If a cable can break, it will and leave you standing awkwardly amidst an eerie hum and not knowing where it’s coming from.
But you may need cables, albeit virtual, even in the digital world. For example, you have a music program that you really like but it doesn’t exist in VST format. How to drive it from your DAW?
I would like to build a monument dedicated to people like Tobias Erichsen, creator of VirtualMIDI. Its utility allows you to quickly create a virtual MIDI cable (more cables if necessary), and thus it will be simple to connect your standalone software (non VST) with a MIDI channel of your DAW and so all events can be recorded and played back even without VST. Really excellent.
Also have a look at all of Tobias’ other utilities, some are really useful even if more complex to use (a MIDI network driver? Really?).
If instead you need to capture an audio stream (for example, a singer who sings remotely on your base station in Skype) you will need an audio router.
Sound threatening? It’s just weird terms, it’s actually as simple as plugging a jack into your mixer or amp. Let’s see how.
Probably the most complete solution is the free and open source Jack Audio Connection Kit, which can handle both MIDI and audio cables.
With Jack2 you can also connect your DAW to OBS, thus opening the door to audio/video performances. If you’re already drooling, hold back.
If, on the other hand, you only need a no-frills audio cable, plug and unplug, probably the simplest and freest solution is that of VB Audio, VB-CABLE Virtual Audio Device.
Cable input, cable output and done. Just connect the right cable to the right place. All audio streams sent to VB-CABLE inputs (Playback Device) will be forwarded to VB-CABLE outputs (Recording Device).